 Français (France)
 English (UK)
 English (US)
 Deutsch (Deutschland)

Saturday morning, the boot wall at the outdoor store: forty pairs in a neat row, tags packed with words like “mid,” “lug,” and “shank,” and a salesperson asking where you plan to hike. Good question. It’s the only one that really matters: you choose boots for the terrain, not for the color or the promises on the box.
It’s not just about comfort. At Bryce Canyon National Park, shoes or boots not designed for hiking are the number one cause of rescues and of injuries that require a hospital visit [1]. Great Smoky Mountains National Park lists improper footwear among its leading causes of injuries [2]. And across the Atlantic, the Swiss Council for Accident Prevention (BFU) says most mountain hiking accidents come from missteps and slips; it calls for sturdy boots with a non-slip sole and a good tread [3].
The upper: low-cut, mid, or high-cut
The upper wraps your foot and ankle. For dirt and gravel trails, the National Park Service recommends sturdy, rubber-soled hiking boots with ankle support; on paved paths, tennis shoes will do, and heels, open-toed shoes, and flip-flops aren’t ideal for hiking [4]. Great Smoky Mountains advises ankle-supporting boots against slips, trips, and falls [2].
In Switzerland, the BFU matches boots to trail types: light hiking shoes for yellow-marked hiking trails, trekking boots that wrap the ankle for mountain trails, and stiff mountaineering boots that take crampons for alpine routes [3]. A mid-height boot is a compromise. The German Alpine Club (DAV) notes that the soft, mid-height cuff of light mountain boots gives mobility, but little support under a very heavy pack [5]. The heavier your pack and the rougher the trail, the higher the ankle should go.
The sole: grip and stiffness
Two things matter underfoot. Grip first: a non-slip sole with a well-defined tread, as the BFU asks [3]. Pinnacles National Park, whose trails are all unpaved and may be rocky, steep, or uneven, warns that sneakers, sandals, and dress shoes may not provide adequate grip [6].
Then stiffness. A flexible sole bends with the trail, comfortable on easy ground; a stiff sole shields your foot from rocks, holds on the edge of a step, and takes crampons. Most summer hiking boots are built to flex for comfort: their midsole isn’t rigid enough for crampons, and softer uppers can compress under crampon straps, causing discomfort and cold feet, explains the British Mountaineering Council (BMC) [7]. That’s why, in the categories below, the sole stiffens as the ankle rises [5].
The A to D categories: a European yardstick
Many boot labels also carry a letter from A to D, a system worth decoding if you’re heading for the Alps. The German Alpine Club explains that hiking and mountain boots are sorted by use into these categories, introduced in the 1970s. Category A covers models with a soft sole and a low cut, comfortable on easy trails; category D, models with a stiff sole and a high, stable cuff, for hard routes in the Western Alps or expeditions [5]. Intermediate categories fill the gap. The German manufacturer Meindl says the system was created within the family business in 1975 to classify its boots, and that many manufacturers now use it. Its UK website lays out the grid like this [8]:
| Category | Terrain | Crampons |
|---|---|---|
| A | Everyday walking, easy trails, and low-elevation paths | No |
| A/B | Walking and hiking on footpaths and low hills | No |
| B | Demanding hikes, including low-elevation trails in the Alps or Pyrenees in summer | No |
| B/C | Multiday trips, demanding treks, high mountains, rough trails, scree, fixed-rope routes | Occasional use |
| C | Mountain terrain: unmarked routes, scree, glaciers | Yes |
| D | High-level mountaineering, expeditions to the high Alps and the Himalayas | Fully compatible |
Based on Meindl’s UK grid, which mentions crampons only from B/C up; other brands rate their own models. [8]
These categories are a manufacturer’s yardstick: they describe the use each maker intends for its own models [8]. Between two categories, choose for your toughest hike, not your most frequent one. Meindl’s advice runs the same way: when in doubt, pick the sturdier boot, which covers a wider range of uses [8]. And take a close look at light mountain boots, which are hard to classify because they blend stability and agility, the DAV notes [5].
Crampons and Britain’s B0 to B3 ratings
Crampons only go on boots built for them: if the sole isn’t stiff, the boot bends and the crampon can fall off, the BMC warns. It rates hiking boots from B0 to B3 and crampons from C1 to C3, and calls a B1 boot the absolute minimum for crampons [7]:
| Boot | What it is | Crampons |
|---|---|---|
| B0 | Summer hiking boot, built to flex for comfort | Unsuitable |
| B1 | Fairly stiff sole, for crossing a short patch of snow or ice at lower elevations in spring or fall | C1 only |
| B2 | Stiff four-season mountaineering boot | All day; likely to take a heel clip, not just a heel basket |
| B3 | Technical boot, rigid in sole and upper, for mountaineering and ice climbing | C3, and also C2 and C1 |
From the British Mountaineering Council (BMC). [7]
On the crampon side, a C1 is a flexible walking crampon held on with straps and toe and heel baskets, and a C3 a technical climbing crampon fixed with a heel clip [7]. Two national parks raise the same question in winter: Bryce Canyon strongly recommends traction devices for all areas of the park [1], and Great Smoky Mountains suggests crampons or other traction devices on icy high-elevation trails [2]. The BMC’s caution applies. Micro-spikes suit flat or gently sloping paths with ice or packed snow, but often won’t keep you secure where a slip could turn into a long slide or a fall [7].
On the A to D scale, Meindl’s grid starts crampons at B/C, for occasional use [8], and the DAV rates light mountain boots as conditionally compatible with semi-automatic crampons [5]. When you buy crampons, bring your boots along, the BMC advises: the two have to suit each other and be adjusted together [7].
Fitting and breaking in
Try boots on in the afternoon or evening: your feet swell a little over the day, just as they do at the end of a hike, say the DAV and Meindl [5, 8]. The DAV recommends walking around in them for at least 10 to 15 minutes, the only way to tell whether they really fit [5]. Meindl suggests wearing them around the house first, to check the size before you take them outside [8]. Every manufacturer builds on its own lasts, the foot-shaped forms a boot is made around, and they can vary between models [5]: don’t skip the fitting, and treat your usual size as a starting point.
Break new boots in before a big hike, the BFU advises, and wear good hiking socks to cut the risk of blisters [3]. For longer hikes, the Park Service suggests thick wool or synthetic socks that wick moisture, plus an extra pair [4]. Toss a few blister bandages into your day hike pack while you’re at it.
The right boot isn’t the priciest or the tallest: it’s the one that fits the terrain of your next hike, tried on in the afternoon and already broken in. For the rest of your prep, our guide to planning a hike walks you through every step, and our guide to hiking difficulty ratings tells you what the terrain will look like.
Gear related to this article
No affiliation: no commission, no sponsored products.
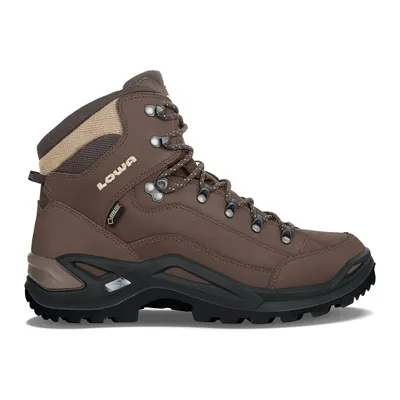
Lowa Renegade GTX Mid
A versatile mid-height hiking boot: leather upper, Gore-Tex membrane, and Vibram sole, on a last made for medium-width feet. Men’s model, also made in a women’s version.
View on Amazon (opens in a new tab)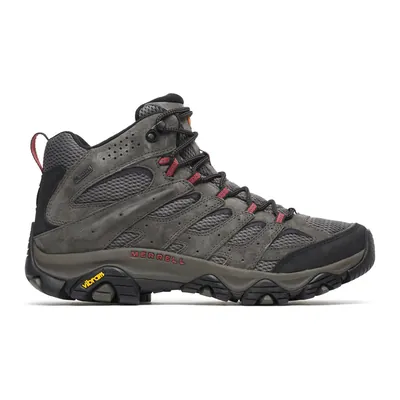
Merrell Moab 3 Mid Waterproof
A mid-height hiking boot with a waterproof membrane, Vibram TC5+ outsole with 5 mm lugs, and an air cushion in the heel. Men’s model, also made for women and in wide widths.
View on Amazon (opens in a new tab)
Worth watching
Quick checks to run when you try on hiking boots, from the socks you wear to fit, volume, and a downhill test, to go with this guide’s advice on fitting and breaking them in.
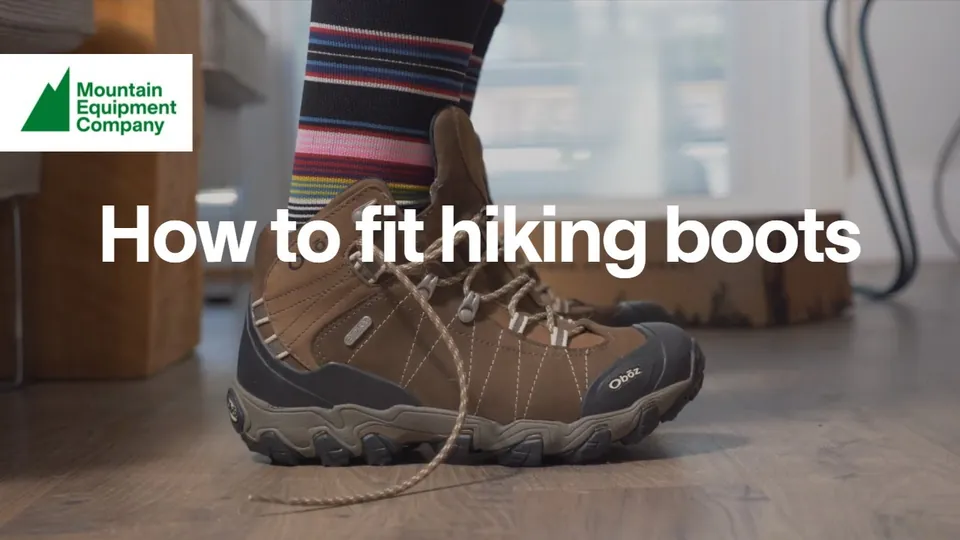
The video is hosted by YouTube (Google): nothing loads until you play it, and Google may then set cookies.
FAQ
Should I get low-cut or high-cut hiking boots?
It depends on the terrain. The National Park Service recommends sturdy, rubber-soled boots with ankle support for dirt and gravel trails, and says tennis shoes are fine on paved paths. Great Smoky Mountains National Park advises ankle-supporting boots against slips, trips, and falls. The heavier your pack and the rougher the trail, the higher the ankle should go.
What do the A, B, C, and D categories mean?
They’re a European system that shows the use a manufacturer intends. Category A covers flexible, low-cut models for easy trails; D covers stiff, high-cut models for mountaineering and expeditions, with A/B and B/C in between. The categories date from the 1970s, according to the German Alpine Club. Each brand rates its own models, so compare them by intended use.
What do B0, B1, B2, and B3 mean on boots?
They’re British ratings from the British Mountaineering Council. B0 boots flex for comfort and don’t take crampons; B1 boots have a fairly stiff sole and take only a flexible C1 crampon, to cross a short patch of snow or ice; B2 boots are stiff four-season boots that can wear crampons all day; B3 boots are rigid technical boots for mountaineering and ice climbing.
Can you put crampons on hiking boots?
Only if they’re designed for it. A boot that flexes bends under a crampon, and the crampon can fall off, the BMC warns. On the European A to D scale, Meindl starts crampons at B/C, for occasional use. Micro-spikes work on flat or gently sloping icy paths, but often aren’t secure enough where a slip could turn into a long slide or a fall.
When should you try on hiking boots?
In the afternoon or evening, when your feet have swollen a little, wearing the socks you’ll hike in. Walk around for at least 10 to 15 minutes, as the German Alpine Club recommends, then wear them around the house before taking them outside, as Meindl suggests. Every brand builds on its own lasts, so your usual size is just a starting point.
How do you avoid blisters with new hiking boots?
Break them in before a big hike, as the Swiss Council for Accident Prevention advises, and wear good hiking socks. For longer hikes, the National Park Service suggests thick wool or synthetic socks that wick moisture, plus an extra pair. Keep a few blister bandages in your first aid kit, and give new boots a few short outings before a long day.
Sources
- National Park Service, Bryce Canyon National Park, “Safety,” updated October 11, 2024, accessed October 28, 2026. nps.gov https://www.nps.gov/brca/planyourvisit/safety.htm ↩
- National Park Service, Great Smoky Mountains National Park, “Hiking Safety,” updated December 17, 2025, accessed October 28, 2026. nps.gov https://www.nps.gov/grsm/planyourvisit/hikingsafety.htm ↩
- Swiss Council for Accident Prevention (BFU), “Rando en montagne” campaign, “Bien s’équiper” (in French), accessed October 28, 2026. rando-en-montagne.ch https://www.rando-en-montagne.ch/fr/bien-s-equiper ↩
- National Park Service, “Hike Smart,” updated June 13, 2024, accessed October 28, 2026. nps.gov https://www.nps.gov/articles/hiking-safety.htm ↩
- German Alpine Club (DAV), “Materialkunde: Leichtbergstiefel,” Panorama 1/2026, February 4, 2026 (in German), accessed October 28, 2026. alpenverein.de https://www.alpenverein.de/artikel/materialkunde-leichtbergstiefel_772fd56e-8269-4b7d-82ae-8da671438226 ↩
- National Park Service, Pinnacles National Park, “Safety,” updated October 17, 2024, accessed October 28, 2026. nps.gov https://www.nps.gov/pinn/planyourvisit/safety.htm ↩
- British Mountaineering Council (BMC), “Walking boots, crampons and micro spikes,” accessed October 28, 2026. thebmc.co.uk https://thebmc.co.uk/en/walking-boots-crampons-micro-spikes ↩
- Meindl UK, “Which Meindl boot should I choose?” the manufacturer’s category grid, updated June 23, 2026, accessed October 28, 2026. meindl.co.uk https://www.meindl.co.uk/which-meindl-boot-should-i-choose/ ↩
- Swiss Council for Accident Prevention (BFU), “Rando en montagne” campaign, fact sheet “Hydrolyse: quand vos chaussures de randonnée vieillissent (parfois prématurément)” (PDF, in French), accessed October 28, 2026. cdn.sanity.io https://cdn.sanity.io/files/vy2mige5/production/bd936a76d6737d9c4b56e60da714e863bced3664.pdf ↩

Camping, backpacking, bushcraft and hiking
Guillaume Hoarau writes for Outfarer about camping, backpacking, bushcraft, and hiking. A survival-skills buff and a collector of vintage field manuals, he loves clear explanations, lists that actually help and other people’s stories, which he tells well.


