 Français (France)
 English (UK)
 English (US)
 Deutsch (Deutschland)

Contents
At the car park, it’s a familiar scene: two brand-new poles, set by eye on the day they were bought, one shorter than the other because a section slid down in the boot. On the first zigzag, your shoulders creep up towards your ears; on the first descent, you stoop to reach the ground. A badly set pole doesn’t hurt straight away: it just wears you out, quietly.
Getting the length right comes down to one gesture, the right angle at the elbow, and two adjustments, one for going up and one for coming down. Height-based formulas give you a starting point: this guide sets those of a manufacturer, a retailer and a federation doctor side by side, explains why they differ, then moves on to pole types, wrist straps, the research and rubber tips. It fills in the ‘Get your kit together and pack your rucksack’ step of our guide to planning a walk, after walking boots; and the day walk kit list is a reminder that a good rucksack has somewhere to strap them.
The basic rule: a right angle at the elbow
Standing on flat ground, hold the pole by its grip, tip on the ground by your foot. Your upper arm hangs naturally and your forearm stays level: your elbow makes a right angle. Hand too high, shorten the pole; too low, lengthen it. That’s Leki’s method [1], and that of the German Alpine Club (DAV), which talks of an angle of about 90° [2]. Stiftung Warentest, the German consumer testing organisation, gives a similar benchmark: an angle of about 90° between arm and shaft [3]. Black Diamond puts it as a height: on the flat, the top of the grip comes to your waist or hip [4].
One exception: ‘cane’ poles, whose grip you hold from above. Decathlon, the French sports retailer, sets them shorter, arm almost straight, elbow opened to about 140° [5]. This guide is about classic poles, the ones you hold with your fist closed around an upright grip.
What length for your height: the chart
To buy a fixed-length pole, or to rough out the setting on a telescopic one, you can start with a multiplication. Leki takes your height in centimetres and multiplies it by 0.68: about 120 cm for 1.75 m [1]. Decathlon, which sells its own poles, applies the same coefficient and gets 119 cm for the same height [5]. In 2012, the federation doctor of the French mountaineering and climbing federation (FFME), Pierre Belleudy, recommended adjustable poles ideally measuring two-thirds of your height [6], or about 0.67. For 1.70 m, the first formula gives 116 cm, the second 113 cm.
| Height | 0.68 × height (Leki, Decathlon) | 2/3 of height (FFME) | Uphill (5 to 10 cm shorter) | Downhill (5 to 10 cm longer) |
|---|---|---|---|---|
| 150 cm (4 ft 11 in) | 102 cm | 100 cm | 92 to 97 cm | 107 to 112 cm |
| 155 cm (5 ft 1 in) | 105 cm | 103 cm | 95 to 100 cm | 110 to 115 cm |
| 160 cm (5 ft 3 in) | 109 cm | 107 cm | 99 to 104 cm | 114 to 119 cm |
| 165 cm (5 ft 5 in) | 112 cm | 110 cm | 102 to 107 cm | 117 to 122 cm |
| 170 cm (5 ft 7 in) | 116 cm | 113 cm | 106 to 111 cm | 121 to 126 cm |
| 175 cm (5 ft 9 in) | 119 cm | 117 cm | 109 to 114 cm | 124 to 129 cm |
| 180 cm (5 ft 11 in) | 122 cm | 120 cm | 112 to 117 cm | 127 to 132 cm |
| 185 cm (6 ft 1 in) | 126 cm | 123 cm | 116 to 121 cm | 131 to 136 cm |
| 190 cm (6 ft 3 in) | 129 cm | 127 cm | 119 to 124 cm | 134 to 139 cm |
| 195 cm (6 ft 5 in) | 133 cm | 130 cm | 123 to 128 cm | 138 to 143 cm |
Calculated by us from the published formulas, rounded to the nearest centimetre; heights in feet and inches rounded to the nearest inch. The uphill and downhill adjustments are Leki’s, applied here to the 0.68 column. None of the three sources says whether height is measured barefoot or in shoes. [1, 5, 6]
Manufacturers’ charts round things into bands. Leki puts walkers of 170 to 180 cm on poles of 115 to 125 cm [1]; Black Diamond, for its Distance Carbon Z folding pole, suggests 120 to 125 cm from 171 to 182 cm [4]. Between two lengths, Black Diamond decides by use: the longer one for walking, where stability and support matter, the shorter one for running, where uphill drive matters [4].
Why the formulas don’t give the same figure
Between 0.68 and two-thirds, the gap is 2 to 3 cm across the whole chart: less than the adjustment for a climb. These coefficients are starting points, as Leki itself says, to be fine-tuned with the elbow test [1]. And the setting remains a matter of taste: after the right angle, some like it a little longer, others a little shorter, notes the DAV [2].
The coefficient also changes with the activity. For Nordic walking, Metsähallitus, the Finnish forests and parks agency, takes 0.68 as a general rule, but varies it with intensity: 0.62 for a beginner walking on the flat, 0.65 for brisk walking on gentle slopes, 0.68 for good fitness, 0.72 for an athlete tackling hills [7]. So the 0.68 of walking poles is also the Nordic walking figure; cross-country skiing has its own coefficients, much larger, set out in our guide to cross-country ski and pole length.
| Activity, according to Metsähallitus | Coefficient | For 1.75 m |
|---|---|---|
| Beginner, on the flat, able to talk | 0.62 | 109 cm |
| Brisk walking, gentle slopes | 0.65 | 114 cm |
| Good fitness | 0.68 | 119 cm |
| Athlete, demanding hills | 0.72 | 126 cm |
Metsähallitus coefficients for Nordic walking; lengths calculated by us and rounded to the nearest centimetre. [7]
On the research side, the two studies we found on pole length are both about Nordic walking. In 2023, an Italian team had 12 young men walk with poles at 55, 65 and 75% of their height, at 4, 5 and 6 km/h: at 65%, neither movement nor perceived effort differed from the other two lengths; at 75%, oxygen consumption rose at 6 km/h [8]. In 2009, 12 Nordic walkers climbed a 12° slope with poles at their own chosen length, then with poles 7.5 cm shorter: 3% more energy expenditure with the short ones, for similar comfort, and no difference on the flat or downhill [9]. Neither sets an ideal coefficient for hillwalking.
Uphill, downhill, across a slope: adjusting on the way
On a sustained climb, Leki shortens each pole by 5 to 10 cm, so you can push down into the slope [1]; Decathlon talks of lowering the height slightly [5]. The ground rises in front of you and the pole meets it sooner: without adjusting, your hand rises, and your shoulder with it. For a short climb, there’s no need to touch the lock: on a pole with a long grip, your hand simply moves further down the shaft, notes Stiftung Warentest [3].
Going down, it’s the reverse. Leki lengthens by 5 to 10 cm, so you can plant ahead and below without bending double [1], and Stiftung Warentest gives the same range for steep descents, leaning on both poles [3]. The DAV simply considers a slightly longer pole better on steep descents [2], and the FFRandonnée, the French walking federation, asks more generally that you adjust the pole’s length to keep roughly a 90° angle between upper arm and forearm [10].
That leaves the traverse, a path cut across a slope where the ground is higher on one side than the other. There, the DAV changes grip: on the uphill side, the hand moves some way down below the grip; on the downhill side, it rests on the top of the handle. Both hands thus get back to a good working height [2]. That’s what grips extended downwards are for, according to Stiftung Warentest [3].
Fixed, folding or telescopic: set once or on the way
A few centuries separate the alpenstock of old and the hazel stick decorated with walking badges from today’s folding carbon poles, the DAV points out [2], and Leki says it launched the first adjustable trekking pole in 1974 [1]. Today, the FFRandonnée distinguishes three main types: fixed, telescopic and folding [10]. For length, only one question matters: do you choose it once and for all, or on the way?
| Type | Length adjustment | Folded | What the manufacturer says |
|---|---|---|---|
| Fixed | None: you buy the length | Doesn’t fold | The lightest and stiffest, for runners and minimalists who know their number (Leki) |
| Fixed-length Z folding | None: one model per length, from 105 to 130 cm | 35 to 44 cm | Black Diamond’s Distance Carbon Z, 256 to 296 g a pair |
| Adjustable folding | About 20 cm of range | Small pack size | Versatile, for travelling or scrambling (Leki, Vario range) |
| Telescopic | Push button, lever or internal expander | About 75 cm with 2 sections, 55 cm with 3, 40 cm with 5 (Decathlon) | Any length across a wide range, for varied terrain or shared poles (Leki) |
From Leki, Black Diamond and Decathlon, each about its own models. [1, 4, 5]
On a telescopic pole, Decathlon describes three locking systems. The push button sits in a hole in the tube: simple and reliable for beginners, but limited by the spacing of the holes. The lever, or external lock, clamps the tube at any height. A combination of the two, finally, is what the brand recommends for long mountain days. A pole with no visible adjustment hides an expander inside the tube [5].
For length, the upshot is simple: a fixed pole has to be right when you buy it, and can only follow the slope through your grip, as the DAV describes [2]. Decathlon in any case recommends an adjustable model [5]. Gram-counters will still eye up fixed poles: check your elbow before you get to the till, because after that there’s no fudging it.
Wrist straps: from below, and not on every descent
On the flat and on moderate slopes, Stiftung Warentest advises putting your hand up through the strap from below: that’s how you lean properly on the pole as you walk [3]. On steep descents, it’s the reverse. In the mountains, the FFRandonnée says to take off the straps on steep or dangerous descents [10], and Stiftung Warentest explains why: with your hands free, you can break a fall better [3]. The DAV goes further: without straps, you can quickly move both poles into one hand, change the height of your grip, and the risk of injury in a fall is lower [2].
The FFRandonnée adds two instructions: two poles rather than one, because a single pole makes your gait asymmetric and can bring on pain, and poles held on either side of the body. It also points out that you can take a serious fall by tripping over your own poles, or injure a companion [10].
Knees and effort: what the studies measured
Poles ‘save your knees’, or so the saying goes. Here’s what the studies we read actually measured, with their conditions, from the laboratory to the mountains.
| Study | Who | Conditions | Result |
|---|---|---|---|
| Schwameder et al., 1999 | 8 men | Descent on a ramp inclined at 25°, in a laboratory | Ground reaction force, knee moment, and compressive and shear forces in the knee, the latter calculated with a model: 12 to 25% lower |
| Willson et al., 2001 | 13 healthy adults | Walking on the flat | Lower vertical force at the knee; impulse of the knee extensor muscles, their cumulative effort over the step, 7.3 to 10.4% lower depending on how the poles were planted |
| Jensen et al., 2011 | 10 healthy adults | Walking on the flat, pushing up to 2.4 times harder on the poles | No reduction in knee compression force |
| Bohne and Abendroth-Smith, 2007 | 15 experienced walkers, men | Descent with no rucksack, then with 15% and 30% of body weight on the back | Lower moments at the ankles, knees and hips with poles, whatever the load |
| Howatson et al., 2011 | 37 active people: 26 men, 11 women | Up and down Snowdon (Yr Wyddfa), in Wales, with a 5.6 kg rucksack on average | Lower perceived effort on the way up, same heart rate; strength better maintained up to 48 hours afterwards, less muscle soreness at 24 and 48 hours |
| Saunders et al., 2008 | 14 recreational hikers | Varied course, same speed with and without poles | Oxygen consumption 10% higher, heart rate 6 beats per minute faster, perceived effort unchanged |
From the published abstracts, read on 8 November 2026. The Saunders percentage is calculated by us from the published means. [11, 12, 13, 14, 15, 16]
Going downhill, the measurements point the same way, but on few people and often in the laboratory: Schwameder’s 25% is the top of a range obtained from eight men, a 25° ramp and a model of the knee [11]. On the flat, two studies contradict each other. One finds a lower vertical force at the knee [12]; the other no drop in compression, even when pushing hard, and its authors think the result could differ off the flat or in people with osteoarthritis [13]. As for effort, the arms are working: heart rate and oxygen consumption go up, without the walk feeling any harder [16].
A review published in 2020 sums it up: without a load, it’s a trade-off, less stress on the legs against more work for the heart; with a heavy rucksack, poles can help by reducing leg muscle activity and improving balance and stability [17]. The DAV adds nuance: poles cushion force peaks on the knee on descents and big steps, but heavy use can overload the wrists, and walking without poles keeps your balance in trim; it advises alternating, and doing without them in boulder fields, where they’re more danger than help [2]. The FFRandonnée also warns against systematic use, which creates a dependence that harms balance [10].
Rubber tips: where they’re compulsory
A metal tip can scratch rock. The FFRandonnée counts among the risks of poles damage to fragile ground from tips without a rubber cover [10]. Stiftung Warentest keeps these rubber pads for tarmac and paving, where they protect the tip and muffle the clicking; they’re no good on forest floor, grass or scree [3].
Some places make it a rule. As of 8 November 2026, we had read three:
- Côtes-d’Armor, on the GR34: rubber tips compulsory at Ploumanac’h (Perros-Guirec), the Gouffre de Plougrescant and the Île Renote (Trégastel), and strongly recommended on the département’s other paths, according to Côtes d’Armor Destination, the local tourist board [18].
- Corsica Regional Nature Park, on the GR20: poles banned at Lake Ninu and on the Cuscionu plateau, both sensitive wetlands [19].
- Teide National Park, Tenerife: metal tips banned, even with a rubber cap, except on snow or ice, under the park management plan approved at the end of 2025 [20].
Elsewhere, a rule may exist without our having found it: check with the park or the tourist office before you go. Our guides to the GR34, the GR20 and Mount Teide cover these rules along with the rest of the logistics.
A good habit to get into, at the car park: pole planted by your foot, forearm level, and a glance at where the lock sits on the shaft. At the foot of the first climb, a few centimetres less; before the descent, a few centimetres more, and hands out of the straps if the path turns steep. The chart gives you the starting point; your elbow has the final say.
Kit related to this article
No affiliation: no commission, no sponsored products.
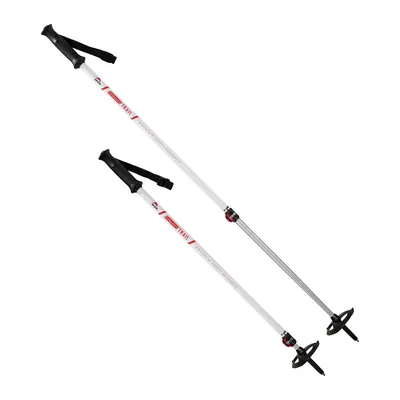
MSR DynaLock Trail Poles
Aluminium poles adjustable from 100 to 140 cm, with a DynaLock lever lock that tightens without tools, plus snow and summer baskets: shorter uphill, longer downhill.
View on Amazon (opens in a new tab)
Worth watching
The Map Reading Company, a British navigation-skills channel, shows how to set walking poles to the right height, then how to use them uphill, downhill and on rough ground to take strain off the legs.
The video is hosted by YouTube (Google): nothing loads until you play it, and Google may then set cookies.
FAQs
What length walking pole for someone 1.70 m (5 ft 7 in) tall?
Allow about 116 cm with Leki’s and Decathlon’s formula, 0.68 times your height, and 113 cm with the two-thirds recommended by a doctor from the French mountaineering federation (FFME). Leki puts walkers of 170 to 180 cm on poles of 115 to 125 cm. That figure is only a start: on the flat, your elbow should make a right angle, forearm level, tip on the ground by your foot.
Should you set your poles differently uphill and downhill?
Yes, according to Leki: shorten them by 5 to 10 cm on a sustained climb and lengthen them by 5 to 10 cm on a long descent. Stiftung Warentest, the German consumer testing organisation, gives the same range for steep descents. For a short climb, a long grip saves you touching the setting: your hand simply moves down below the grip.
Fixed, folding or telescopic poles: which should you choose?
A fixed pole is the lightest and stiffest according to Leki, but you buy it at the right length and it doesn’t adjust. A Z folding pole can also be fixed-length, like Black Diamond’s Distance Carbon Z, sold from 105 to 130 cm. A telescopic pole adjusts on the way, to follow the slope or to pass from one person to another.
How do you put on a walking pole’s wrist strap?
On the flat and on moderate slopes, put your hand up through the strap from below: according to Stiftung Warentest, you lean on the pole better that way. On steep or dangerous descents, the French walking federation FFRandonnée advises the opposite, taking your hands out of the straps so you can break a fall. The German Alpine Club (DAV) notes that without a strap, the risk of injury in a fall is lower.
Do walking poles protect your knees?
Going downhill, several studies measure an effect: 12 to 25% lower forces and moment measured at the knee among eight men on a laboratory ramp, and less muscle soreness after climbing and descending Snowdon in a study of 37 walkers. On the flat, the results contradict each other. The German Alpine Club (DAV) advises using poles in moderation, alternating with walking without them, and doing without them in boulder fields.
Sources
- Leki UK, ‘Walking Pole Length Guide: What Size Do I Need?’, blog, 17 June 2026, accessed 8 November 2026. leki.co.uk https://www.leki.co.uk/blog/walking-pole-length-guide ↩
- German Alpine Club (DAV), Max Bolland, ‘So geht das: Trekkingstöcke richtig einsetzen’ (how to use trekking poles properly), Panorama 4/2021, 15 July 2021, updated 27 March 2024 (in German), accessed 8 November 2026. alpenverein.de https://www.alpenverein.de/artikel/so-geht-das-trekkingstocke-richtig-einsetzen_d294025d-018e-4cb3-b1ab-d12c1311476b ↩
- Stiftung Warentest, ‘Wanderstöcke im Test: Tipps zum Wandern mit Stöcken’ (tips for walking with poles), 17 January 2024 (in German), accessed 8 November 2026. test.de https://www.test.de/Wanderstoecke-im-Test-5623087-6084170/ ↩
- Black Diamond, Distance Carbon Z poles product page and suggested length chart, accessed 8 November 2026. blackdiamondequipment.com https://blackdiamondequipment.com/products/distance-carbon-z-poles ↩
- Decathlon, ‘Comment bien choisir vos bâtons de randonnée ou de trekking?’ (how to choose walking or trekking poles), advice page (in French), accessed 8 November 2026. decathlon.fr https://www.decathlon.fr/c/htc/comment-bien-choisir-des-batons-de-randonnee-ou-de-trekking_09c68c0f-86de-443c-a58c-0eb11c66623b ↩
- Pierre Belleudy, federation doctor, medical committee of the French mountaineering and climbing federation (FFME), ‘Faut-il randonner avec des bâtons?’ (should you walk with poles?), 12 January 2012 (PDF, in French), accessed 8 November 2026. ffme.fr https://www.ffme.fr/wp-content/uploads/2019/06/randonnee-batons.pdf ↩
- Metsähallitus (Finland), Luontoon.fi, ‘Nordic walking’, accessed 8 November 2026. luontoon.fi https://www.luontoon.fi/en/activities/nordic-walking ↩
- L. Russo et al., ‘The Impact of Nordic Walking Pole Length on Gait Kinematic Parameters’, Journal of Functional Morphology and Kinesiology, 8(2), 50, 2023, abstract accessed 8 November 2026. pubmed.ncbi.nlm.nih.gov https://pubmed.ncbi.nlm.nih.gov/37218846/ ↩
- E. A. Hansen and G. Smith, ‘Energy expenditure and comfort during Nordic walking with different pole lengths’, Journal of Strength and Conditioning Research, 23(4), 1187-1194, 2009, abstract accessed 8 November 2026. pubmed.ncbi.nlm.nih.gov https://pubmed.ncbi.nlm.nih.gov/19528847/ ↩
- French walking federation (FFRandonnée), ‘Les bâtons de randonnée sont-ils utiles? Faisons le point’ (are walking poles useful?), with Dr Lise Grangeon, 13 October 2021 (in French), accessed 8 November 2026. ffrandonnee.fr https://www.ffrandonnee.fr/s-informer/actualites/les-batons-de-randonnee-sont-ils-utiles-faisons-le-point ↩
- H. Schwameder et al., ‘Knee joint forces during downhill walking with hiking poles’, Journal of Sports Sciences, 17(12), 969-978, 1999, abstract accessed 8 November 2026. pubmed.ncbi.nlm.nih.gov https://pubmed.ncbi.nlm.nih.gov/10622357/ ↩
- J. Willson et al., ‘Effects of walking poles on lower extremity gait mechanics’, Medicine and Science in Sports and Exercise, 33(1), 142-147, 2001, abstract accessed 8 November 2026. pubmed.ncbi.nlm.nih.gov https://pubmed.ncbi.nlm.nih.gov/11194099/ ↩
- S. B. Jensen et al., ‘Is it possible to reduce the knee joint compression force during level walking with hiking poles?’, Scandinavian Journal of Medicine and Science in Sports, 21(6), e195-e200, 2011, abstract accessed 8 November 2026. pubmed.ncbi.nlm.nih.gov https://pubmed.ncbi.nlm.nih.gov/21083766/ ↩
- M. Bohne and J. Abendroth-Smith, ‘Effects of hiking downhill using trekking poles while carrying external loads’, Medicine and Science in Sports and Exercise, 39(1), 177-183, 2007, abstract accessed 8 November 2026. pubmed.ncbi.nlm.nih.gov https://pubmed.ncbi.nlm.nih.gov/17218900/ ↩
- G. Howatson et al., ‘Trekking poles reduce exercise-induced muscle injury during mountain walking’, Medicine and Science in Sports and Exercise, 43(1), 140-145, 2011, abstract accessed 8 November 2026. pubmed.ncbi.nlm.nih.gov https://pubmed.ncbi.nlm.nih.gov/20473229/ ↩
- M. J. Saunders et al., ‘Trekking poles increase physiological responses to hiking without increased perceived exertion’, Journal of Strength and Conditioning Research, 22(5), 1468-1474, 2008, abstract accessed 8 November 2026. pubmed.ncbi.nlm.nih.gov https://pubmed.ncbi.nlm.nih.gov/18714242/ ↩
- A. L. Hawke and R. L. Jensen, ‘Are Trekking Poles Helping or Hindering Your Hiking Experience? A Review’, Wilderness and Environmental Medicine, 31(4), 482-488, 2020, abstract accessed 8 November 2026. pubmed.ncbi.nlm.nih.gov https://pubmed.ncbi.nlm.nih.gov/32980249/ ↩
- Côtes d’Armor Destination, ‘GR34, sentier des douaniers: infos pratiques’ (practical information, in French), accessed 8 November 2026. cotesdarmor.com https://www.cotesdarmor.com/balades-et-randonnees/a-pied/gr34-sentier-des-douaniers/infos-pratiques/ ↩
- Corsica Regional Nature Park, ‘GR20 Fra li monti’, recommendations (in French), accessed 8 November 2026. pnr.corsica https://www.pnr.corsica/fr/randonnees-decouverte/gr-20-fra-li-monti ↩
- Government of the Canary Islands, Decree 182/2025 of 1 December approving the master plan for the use and management of Teide National Park, section 6.2.4, Boletín Oficial de Canarias no. 240, 3 December 2025 (in Spanish), accessed 8 November 2026. sede.gobiernodecanarias.org https://sede.gobiernodecanarias.org/boc/boc-a-2025-240-4148.pdf ↩

Camping, wild camping, bushcraft and hiking
Guillaume Hoarau writes for Outfarer about camping, wild camping, bushcraft and hiking. A survival-skills enthusiast and a collector of old field manuals, he likes clear explanations, lists that earn their place and other people’s stories, which he tells well.


